Showing posts with label Breads. Show all posts

April 10, 2012

White Bread 101

Growing up, I always thought that making your own bread was something people did back in the day of Seven Brides for Seven Brothers.  It wasn't for me--except maybe if I had a bread machine to use.  But over time, a little flicker of desire to make my own bread grew up in me.  After what felt like a lot of failure, I came across this recipe for white bread in the King Arthur Flour Baker's Companion.  And after some trial and error, I present to you my own version of how to make white bread...or at least how to make it at 4300 feet above sea level in a dry climate... So, are you ready for a lesson?

Welcome to White Bread 101

Image Source
Tip #1: When making bread, weigh your flour if at all possible.  Measuring it out with a measuring cup is (most times) not an accurate way to measure.  Due to humidity, settling of the flour, amount of pre-sifting, and your measuring technique, each cup of flour can be significantly larger or smaller than the next.  When in doubt, weigh!  I feel like all of my problems with making bread in the past stemmed from not following this tip.  People generally tend to put too much flour into things when they use a measuring cup.  This will leave your bread dry, dense, and...gross.  So weigh it instead!  1 cup flour = 4.25 ounces

Tip # 2: Scald the milk, then add the butter to it.  No, you technically don't have to scald for health purposes anymore, but it breaks down the protein, which helps make a better dough.  Also, if you scald the milk, then add cold butter to it, the milk cools to just the right temperature as the butter melts, and you don't have to worry about heating it up to the elusive lukewarm-what-temperature-is-that-anyway-temperature.  To scald it, just put the milk in a small saucepan over medium-low heat.  When tiny bubbles just start to form around the edge of the pan but it hasn't boiled yet, you're good to go.  Easy, right?

Tip #3: Use instant yeast when possible.  And no, that's not the same thing as active dry yeast.  Instant yeast doesn't need to be proofed beforehand.  If you do need to use active dry yeast, just dissolve it for 10 minutes in your scalded milk and butter mixture before mixing it with the dry ingredients.  But honestly, making bread takes so much time anyway, I'm all for saving that 10 minutes.  Go instant.

Tip #4: Add potato flakes.  Yes, those instant mashed potatoes that do not count as mashed potatoes.  Add them.  They act a bit like potato flour and help the bread hold more moisture.  Bread with potato flakes = moist bread.

Tip #5: Use the right size of loaf pan.  What, you say?  You didn't know there were different sizes?  Neither did I, but there are.  In general, you'll use the size of pan indicated in the recipe (if it actually lists one).  If no pan size is listed, you can figure it out by the amount of flour the recipe calls for.  If your recipe calls for 3-1/2 to 4 cups flour (including other grains, oats, and potato flakes), you'll use a 9x5-inch loaf pan.  If the recipe calls for less than 3-1/2 cups flour, use an 8.5x4.5-inch loaf pan.

*Note: The recipe listed below bakes best in an 8.5x4.5-inch pan, although you can use a 9x5 if that's all you've got.  Just don't expect it to rise above the pan.

Tip #6: Let the dough rise in the right setting.  It took me a long time to figure out which method worked best for me, but after a lot of trial and error, this is the method that I use every time now.  After you've kneaded your dough, place it in a big, lightly-greased glass or metal bowl.  Spray some plastic wrap with non-stick cooking spray, and place it over the top.  Seal off the edges as much as possible.  Place the covered bowl in your oven, and close the oven door.  Leave it closed.  Turn the oven on to warm or the lowest setting available (not broil) and immediately set the timer for 60 seconds!  I speak from experience that if you don't, you'll forget you turned the oven on, and there goes your perfect dough.  When the time goes off, turn off the oven (remember to leave the door closed!), and let it rise for about an hour.  When it's doubled in size, take out the dough, and form it into a loaf.  Place it in a greased loaf pan, cover it with the sprayed plastic wrap, seal the edges as much as possible, and stick it back in the oven.  Turn it on to warm again for 60 seconds, then turn it off.  Once the dough is level with the top of the pan (usually after about 20 minutes for me), take it out of the oven and set it on the stove or counter to finish rising to one inch above the pan.  Meanwhile, preheat your oven to your cooking temperature.  The oven should be preheated at about the same time your dough is the right height for cooking.  Voila!  Simple, right?  You can also use a damp towel instead of the plastic wrap, but I find that the dough still dries out a bit that way.

Tip #7: Don't use your dough as a punching bag.  When a recipe says to "punch down" the dough, don't punch it.  You'll squeeze all of the air out of it, and air = leavening, which is the whole point of letting it rise.  Just gently deflate it with your fingers. That's all you need.  If you go a bit too Rocky with your dough, it will end up being dense.

Tip #8: If it's getting too brown too early, tent it with foil.  Recipes calling for sugar, honey, or a lot of butter tend to brown more quickly.  To prevent this from happening, you can gently lay a piece of aluminum foil over the bread partway through cooking.  Don't pinch it down, just lay it loosely there like a mom would gently lay a blanket over a sleeping baby so as not to wake him up.  The foil allows the bread to keep baking without browning as much.

Phew.  That was a lot.  Are you hanging in there?  Okay, here comes the recipe.

Image Source
White Bread 101
(from King Arthur Flour Baker's Companion--somewhat adapted to my climate)

3 cups + a small handful of flour (or about 13-14 ounces flour)
1/3 cup potato flakes (not potato buds or peals--flakes).
3 Tbsp sugar
2 tsp instant yeast
1-1/4 tsp salt
1-1/8 cups milk (9 fluid ounces)
1/4 cup butter

1. In a large mixing bowl, combine flour, potato flakes, sugar, instant yeast, and salt.  Set aside.  In all honesty, I usually do all of this while I'm scalding the milk (see next step), since they take about the same amount of time anyway.
2. Scald the milk over medium-low heat, then remove the pan from heat and add the butter.  Once the butter has melted completely, pour the milk and butter mixture into the bowl with the flour mixture.  Stir to combine, then knead it all until it's smooth and elastic.  For more info on kneading, see this website.
3. Let it rise until doubled in size (see Tip #6 above).  Gently deflate the dough, form it into a loaf, and place it in an 8.5x4.5-inch loaf pan.  Let it rise until the dough is one inch above the pan.  Meanwhile, preheat your oven to 350 degrees F.
4. Bake for 25 minutes, then tent the loaf with foil and continue baking for another 10-15 minutes or until it sounds hollow when you tap it.  Remove the loaf from the pan immediately, and cool in a wire rack.
5. You did it!  Enjoy your freshly baked homemade white bread.

March 1, 2012

Easy Focaccia

I'm the kind of gal that really likes her grains--bread in particular.  My day is just not complete if I don't have some type of bread.  Last night, ran out of bread.  And eggs.  So I couldn't even make bread, let alone eat it.  I made it until about 3:30 in the afternoon before I decided that something needed to happen.  I turned to the trusty ingredient search on allrecipes.com and searched for bread recipes that did NOT include eggs.  Lo and behold, this recipe for focaccia came up.  I made it to go with our one-pot spaghetti, and it was delicious.  No, it wasn't entirely authentic Italian bread, but it still tasted amazing anyway.  And for being as easy as it was, it was close enough for me.

Image Source
Easy Focaccia
(adapted from Focaccia Bread on allrecipes.com)

2-3/4 cup flour
1 tsp salt
1 tsp sugar
1 Tbsp instant yeast (you can use active dry yeast, but if you do, you might want to proof it in the warm water before adding it to the rest of the ingredients)
1 tsp garlic powder
1 tsp dried oregano
1/2 tsp dried basil
1 pinch black pepper
1 Tbsp olive oil
1 cup warm water
2 Tbsp olive oil
1 Tbsp grated parmesan cheese
1/2 cup shredded mozzarella cheese (optional)

1.  In a large mixing bowl, combine flour, salt, sugar, yeast (unless you're using active yeast and proofing it first), garlic powder, oregano, basil, and black pepper.  If you need to proof your yeast, add it to the warm water now.  
2.  Add the 1 Tbsp olive oil and the water to the flour mixture, and stir to combine.  Turn out onto a lightly oiled surface and knead until smooth and elastic (about 6-8 minutes).  Place the dough in a lightly oiled bowl and let it rise until doubled in size (about 20-30 minutes).  It raises very quickly because of the high yeast to flour ratio, so you might want to set a timer if you're used to waiting for an hour for the first rise.  Also, the fact that it raises so quickly is a bonus because that means it will be in your mouth that much more quickly!
3.  Gently press your fingers into the dough to let some of the air out, then turn it out onto a greased cookie sheet.  Pat the dough into a rectangle about 1/2 inch thick.  Brush it with the remaining 2 Tbsp olive oil, and top it with the cheeses.  Let it rise for a few minutes more while your oven preheats to 425 degrees F.
4.  Use your fingers to "dimple" the dough by making an indentation every couple of inches, then bake it for 15-18 minutes or until it's golden brown.  Let it cool on a cooling rack for 2-3 minutes, and serve it warm.
5.  Savor every bite.  Get seconds.

Pin It

December 14, 2011

Diana's Famous Rolls

Before my lovely friend, Diana, gave me this recipe, I had never had much luck with rolls.  But this recipe rocks 1) because it's delicious, and 2) because it's forgiving.  The first time I made it, I actually added four times too much water (don't ask), and after adding more flour, they still turned out!  The next time I made them, I followed the recipe, and they were amazing--AMAZING.  I will probably never look for another roll recipe again because I love them.  Here they are:

Image Source
Diana's Famous Rolls

* Yields 4 dozen rolls

2 cups milk
8 Tbsp butter (one stick)
2 Tbsp yeast
1/2 cup water
3 cups flour
3/4 cup sugar
1 Tbsp salt
6 - 6 1/2 cups flour
Butter for brushing tops of rolls

1. In a small saucepan over medium-low heat, scald the milk.  Remove from heat, and throw in a stick of butter to melt.  If it's taking a long time to melt, put it back on the off-but-still-warm burner until it melts completely.  Meanwhile, soften your yeast in the water. 
2. In a large mixing bowl, combine 3 cups flour, sugar, and salt.  Add milk mixture, and stir to combine.  Add yeast and water mixture.  Stir in the rest of the flour (6 - 6 1/2 cups) until it forms a nice, soft, smooth dough.  Place the dough in a lightly oiled bowl, cover it, and let it rise for 2 hours, or until doubled in size.  
3. Divide the dough into 4 equal portions, and grease 2 cookie sheets.  Roll out each dough portion into a large circle about 1/4 inch thick.  Cut the circles into 12 "pizza slices" or triangles.  Roll each slice, starting with the large end, into a crescent shape.  Or, if you want, they work just as well in regular round roll shape.  Place rolls on the baking sheet and brush with butter.  Cover, and let them rise until doubled (about 30-40 minutes).  
4. Preheat oven to 375 degrees F.  Bake rolls for approximately 12 minutes, or until they're golden brown.  Brush with melted butter as they come out of the oven.  This will not only give them a buttery delicious flavor, it will actually prevent too much steam from escaping, leaving you with super moist rolls.  Cool, huh?
5.  Yum!  Devour those rolls.

November 3, 2011

Orange Rolls

This recipe comes to you straight from the lovely ladies at my church.  These orange rolls are delicious, and maybe I just haven't been around enough in the orange roll world, but I've never seen orange rolls assembled this way.  I think I actually said, "Whoa!" when I saw how they were putting them together.  And boy, were they tasty.  I ate so many of them that I actually started to feel sick.  They were amazing.  Enjoy!

Image Source
Orange Rolls

Dough:
2 cups milk
1/2 cup butter (1 stick)
2 pkgs yeast (or 4-1/2 tsp yeast)
1/2 cup warm water
1/2 cup sugar
2 tsp salt
3 eggs
7 cups flour

Filling:
1/2 cup butter (1 stick)
1 cup sugar
zest of one orange (just grate it on the small side of your cheese shredder)

Glaze:
1/4 tsp vanilla
1/4 tsp almond extract
2 Tbsp butter
Juice of one orange
Powdered sugar

1. Scald milk by heating it in a small saucepan over medium heat until small bubbles begin to form around the edge of the pan.  Don't get it so hot that it boils.  Technically, since we have pasteurized milk now, you can skip this step, but it actually breaks down the proteins in the milk, which gives you a better dough in the end. Throw your cold stick of butter into the milk.  This will melt the butter and cool the milk to the right temperature.
2. In small bowl, combine yeast and 1/2 cup warm water.  Let it sit and dissolve for a moment while you mix together the sugar, salt, eggs, and flour in a large mixing bowl.  Add the yeast mixture and the milk.  Mix until well-combined, cover it with a towel and let it rise until doubled in size.
3. Make the filling by combining butter, sugar, and the zest of one orange.
4. When the dough has doubled, roll it out into a big rectangle and cover it with the filling.  Cut dough into 1-inch strips (a pizza cutter works great here).  Stack 3 strips on top of each other until you've used up all of the strips.  Now take the pizza cutter and cut each strip into 1-inch squares.  Place the squares turned on their sides into greased muffin tins (one square per muffin spot).  Cover, and let rise until doubled.  It should look something like this...

5. Meanwhile, preheat the oven to 350 degrees F.  Bake rolls for 12 minutes.
6. While the rolls are baking, combine vanilla, almond extract, butter, the juice of the orange you zested, and enough powdered sugar to make it the right consistency.  This will depend a lot upon personal preference.
7. Glaze those rolls!  When your rolls come out of the oven (if you have incredibly heat-resistant fingers, which I do not), you can grab them and just dip the top of each roll into the glaze.  This will just barely coat it and leave it shiny and delicious-looking.  If you're like me and can't take the heat, just wait for them to cool and then drizzle it on.
8. Eat them now before everyone else does!

October 5, 2011

Homemade Bread Bowls

What's better than soup?  Soup in a bread bowl, of course.  But what's better than soup in a bread bowl?  Soup in a homemade bread bowl.  It seems like a challenge--like you'd have to be crazy to make your own bread bowls, but it's surprisingly simple and is a sure fire way to impress guests.

Image Source
Homemade Bread Bowls
(from this recipe on allrecipes.com)
*Yields 8 medium bread bowls or 6 large bread bowls

2 (.25 oz) packets active dry yeast (or about 4 1/2 tsp)
2 1/2 cups warm water
2 tsp salt
2 Tbsp oil (I like olive oil best)
7 cups all-purpose flour
1 Tbsp cornmeal
1 egg white
1 Tbsp water

1. In a large bowl, dissolve yeast in warm water.  Let it stand until creamy, or about 10 minutes.
2. Add salt, oil, and 4 cups of flour.  Beat well.  Stir in remaining flour 1/2 cup at a time, beating well with each addition.  When the dough has pulled together, turn it out onto a lightly floured surface and knead until smooth and elastic (about 6 minutes).
3. Place the dough in a lightly oiled bowl, cover with a towel, and let rise in a warm place until doubled in volume (about 40 minutes).  If you have a cold house, which is usually the case when you're making bread or soup, just switch the oven to warm for a minute, then turn it off.  Place the bowl of dough and a shallow pan of warm water into the oven, and let it rise in the warm oven.
4. Punch the dough down, and divide it into 8 equal portions (or 6, if you want larger bread bowls).  Form each portion of dough into a round loaf (basically the same as a large roll).  Make sure that you get it into a nice rounded shape.  If it's too flat, there won't be any room for soup inside it.  
5. Grease 2 cookie sheets and sprinkle them with the cornmeal.  Place dough balls onto the cookie sheets (half on each sheet), and let them rise in a warm place until doubled (about 30 minutes).  Meanwhile, preheat the oven to 400 degrees F.
6. In a small bowl, beat together the egg white (or the whole egg, whatever) and 1 Tbsp water.  Lightly brush the loaves with half of the egg wash.
7. Bake in preheated oven for 15 minutes.  Brush with remaining egg mixture, and bake for 10-15 minutes more (depending on whether you made small or medium-sized bowls), until the loaves are golden brown.  If you're cooking both cookie sheets at the same time, remember to switch which pan is on the top or bottom here so they cook evenly.  Cool on wire racks.
8.  Cut the top 1/2 inch off of each bread bowl, and scoop out the inside bread, leaving a wall 3/4 inch thick on all sides.  Fill it with soup, and use the scooped out bread to dip in the soup.  Delicious!

September 30, 2011

Pizza Crust

I've played around with different recipes for pizza crusts.  Every single time, my hopes are high.  I bite into my freshly baked pizza, only to taste gross, dry, disgusting crust.  Disappointment.  But I finally found one that tastes great!  It was awesome, and even though I had to wait for it to rise, it was totally worth it.  This recipe yields two large pizza crusts, so if you only want to make one pizza, just refrigerate or freeze the other half of the dough before you let it rise. Okay, let's make some pizza.

Image Source
Pizza Crust
(adapted from Jay's Signature Pizza Crust on allrecipes.com)

*Yields 2 large pizza crusts

2 1/4 tsp active dry yeast
1/2 tsp brown sugar
1 1/2 cups warm water
1 tsp salt
2 tsp olive oil
3 1/3 cups flour
2 Tbsp melted butter (or olive oil)
Garlic powder to taste

1. In a large bowl, dissolve the yeast and brown sugar in water, and let the whole thing sit for about 10 minutes.  If you've never seen yeast dissolve before, sit and watch. It looks pretty neat, in my opinion.
2. Stir the salt and oil into the yeast solution.  Mix in 2 1/2 cups of the flour.
3. Turn the dough out onto a lightly floured surface and knead in the rest of the dough until it's smooth and elastic (or just leave it in your kitchen aid and let it do the work).  Divide the dough into two equally-sized balls.  If you're just making one pizza, now's the time to refrigerate or freeze one of the dough balls.  Cover the bowl with a cloth and let it rise until doubled in size (about 1 hour).
4. Punch down the dough and form it into a ball again.  Let it sit for a minute to relax before rolling or stretching it out.  Preheat your oven to 425 while you're waiting.  Lightly oil your pizza pan or cookie sheet, and fill it with the dough.  If you want a puffier crust, just fold the edge back over onto itself and press to keep it in place.  Brush the crust with melted butter or olive oil, and sprinkle the garlic salt over the whole thing.  Let it rise 15-20 minutes more.
5. Top it with your favorite toppings (see here for all kinds of topping ideas) and bake on a low rack in the oven for 15-20 minutes, or until the cheese and crust are golden brown.
6. Buon appetito!

July 20, 2011

Apple Bread

I'm a fan of quick breads in general.  They're easy to make and let me satisfy my sweet tooth without eating cookies or something.  I adapted this one mostly from the Better Homes and Gardens Cookbook that I have with a few suggestions I picked up from the comments of various Allrecipes apple bread recipes.  I've made this bread with Fuji and Gala apples because that's what was on sale.  Almost all kinds of apples work for this bread, but steer very clear of Red Delicious when you're baking with apples.  Golden Delicious, Gala, Granny Smith, Macintosh, Honeycrisp, Jonagold, and Fuji apples all work nicely.  Enjoy!

Image by Two Peas and their Pod
Apple Bread
(adapted from the Better Homes and Gardens New Cookbook) 

1 1/2 cups flour
1 tsp cinnamon
1/2 tsp baking soda
1/2 tsp salt
1/4 tsp baking powder
1/4 tsp nutmeg

1/8 tsp ground cloves
1 egg, beaten
1 cup sugar (if you're feeling adventurous, try doing half white, half brown sugar)
1-1/2 cups finely shredded, peeled apple (or about 3 regular-sized apples)  If you like biting into nice, soft, little apple chunks, shred two of the apples and dice the remaining apple
2 Tbsp butter
2 Tbsp applesauce


1. Preheat oven to 350 degrees.  Grease a loaf pan and set it aside.
2. In a large mixing bowl, combine flour, cinnamon, baking soda, salt, baking powder, and nutmeg.  Make a well in the center.
3. In a medium-sized mixing bowl, combine egg, sugar, shredded apples, butter, and applesauce.  Pour the entire apple mixture at once into the well you made in the flour mixture.  Stir until just moistened.  It will be lumpy, and that's a good thing.  Overstirring will actually lessen the quality of the finished bread.
4. Pour batter into prepared loaf pan (sprinkle with cinnamon sugar, if you wish), and bake for 50-55 minutes or until a toothpick comes out clean from the center of the loaf.
5. Cool 10 minutes in pan, then remove from pan and let cool completely on wire racks.  For best results, wrap it up and store overnight before slicing (yeah right!)
6. Relish in your moist, delectable loaf of apple bread.

July 19, 2011

Parmesan Cheese Bread

I really don't know why I haven't put this one up already.  I make it all the time because it goes with almost everything and can round out a meal when you didn't make a side dish and you realize that there's only a bowl of pasta on the table.  In moments like this, I make parmesan cheese bread.  I'm pretty sure that makes my husband's perception of the meal go up about four notches, regardless of whatever else I made.  It's not an exact science, hence the total lack of measurements.  It takes like three minutes to make.

Image Source
Parmesan Cheese Bread

Bread
Butter
Garlic Salt
Seasoning of some sort (Italian seasoning, basil, parsley, oregano...whatever smells good at the moment)
Parmesan Cheese

1. Turn on your broiler to heat up a bit.
2. Butter your bread.  Sprinkle on your seasonings until it looks and smells yummy.  Just be careful with the garlic salt because it tends to blend into the bread, making it hard to tell just how much is on there if you weren't paying attention when you sprinkled.  Parmesan cheese it.
3. Place the bread on a cookie sheet (or, if you're like me, a little piece of aluminum foil) and broil until the edges of the bread are just brown.  Do NOT forget you're making it or your house will end up smelling like smoke all night.  Just watch it, and you'll be fine.
4. Devour the goodness.

June 16, 2011

Fry Bread Scones

Fry bread scones are extremely versatile.  They can be eaten plain, with honey butter and cinnamon, with syrup, or they can be used to make meals like Navajo Tacos.  One day when I was searching for a fry bread recipe I could make quickly (without having to wait for it to rise), I ran across this one and thought it was great.  Give it a try!

Image Source
Fry Bread Scones

2 cups flour
1 Tbsp baking powder
1 tsp salt
1 cup milk
1/2 cup oil

1. In a mixing bowl, combine flour, baking powder, and salt.  Slowly mix in milk with a fork, using just enough milk to make the dough moist.  If you don't use all of the milk, don't worry about it.  Making them too moist makes the dough extremely hard to work with.  If you end up adding too much milk, just add a little flour at a time until you can work with the dough again.
2. Knead dough for 5 minutes, then let dough rest for 5 minutes more.  Meanwhile, heat oil in a skillet over medium heat.  The oil should be about half an inch deep.
3. Separate the dough into individual scone-size pieces, using about 3/4 cup-worth of dough for each scone.  Shape each scone into a round disc about 1/4 inch thick.  For best results, make the middle slightly thinner than the edges of the scone.  
4. Fry each scone in oil until golden brown, turning once.  Remove scones from oil and drain on a paper towel.
5. Top with your favorites toppings and serve.

June 14, 2011

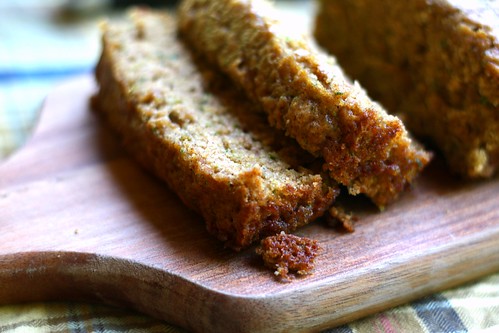
Zucchini Bread

I have become slightly obsessed with zucchini bread lately.  I made three loaves in one week, then went out to the store to buy more zucchini.  It's delicious, plus I get to eat vegetables without really even thinking about the fact that I'm eating vegetables.  I hope you enjoy it.

Image Source

Zucchini Bread
(adapted from the Better Homes and Gardens New Cookbook)

1 1/2 cups flour
1 tsp cinnamon
1/2 tsp baking soda
1/2 tsp salt
1/4 tsp baking powder
rounded 1/4 tsp nutmeg
1 egg, beaten
1 cup sugar
1 cup finely shredded, unpeeled zucchini (or about 1 medium-sized zucchini)
1/4 cup oil

1. Preheat oven to 350 degrees.  Grease a loaf pan and set it aside.
2. In a large mixing bowl, combine flour, cinnamon, baking soda, salt, baking powder, and nutmeg.  Make a well in the center.
3. In a medium-sized mixing bowl, combine egg, sugar, zucchini, and oil.  Pour the entire zucchini mixture at once into the well you made in the flour mixture.  Stir until just moistened.  It will be lumpy, and that's a good thing.  Overstirring will actually lessen the quality of the finished bread.
4. Pour batter into prepared loaf pan and bake for 45-50 minutes or until a toothpick comes out clean from the center of the loaf.
5. Cool 10 minutes in pan, then remove from pan and let cool completely on wire racks.  For best results, wrap it up and store overnight before slicing--that is, if you can resist the temptation to eat it right then and there, which I cannot.
6. Eat loaf.  Go to store.  Buy more zucchini.

May 13, 2011

Poppy Seed Challah

I have always had a fear of yeast.  What if I kill it?  What if it doesn't get warm enough and nothing happens?  Ridiculous?  Most certainly.  So last year I decided to conquer my fear of yeast by making bread that did not have to come out looking like a perfectly risen loaf of bread.  I decided to ease into the world of yeast by making a braided bread.  I searched online for recipes, and here is the one I picked.  It turned out to be a great find because every time I've made it, it has tasted (and looked) incredible.  I love to make this bread for company because they are always impressed, even though it is very easy to make.

Image Source
Poppy Seed Challah
(adapted from but basically the same as Miriam's Not-So-Secret Challah on allrecipes.com)

1 cup water
1/4 cup margarine or butter
3 1/2 cups flour
2 Tbsp white sugar
2 Tbsp brown sugar
1 Tbsp + 1/2 tsp yeast
1 1/2 tsp salt
2 eggs

1/2 egg, beaten
1 1/2 tsp poppy seeds

1. Combine water and margarine (or butter) in a small saucepan and heat until margarine is just melted and water is warm but not boiling.  If it starts to boil, just let it cool off a bit.  This is the trickiest stage for me because it's hard to get it just the right temperature that yeast is supposed to be.  It should feel slightly warm but not hot to your wrist.  I tend to err on the side of it being too warm, since nothing will happen if it's too cold.  If you need help, ask someone or google it, but really, this is something I think you have to get in there and do yourself or you'll always fear this stage...if you're anything like me.
2. In a large mixing bowl, combine 1 cup of the flour, white sugar, brown sugar, yeast, and salt.  I use SAF Instant yeast, so you don't have to proof it first.
3. Add warm water and margarine mixture to flour mixture.  Beat well.  Add eggs, one at a time, beating well after each addition.  Slowly beat in the remaining 2 1/2 cups flour until well mixed.  When dough has pulled together, turn it out onto a lightly floured surface and knead for about 8 minutes.
4. Form into a bowl and toss in a lightly oiled bowl.  Cover and let it rise until doubled in size (about an hour).
5. Punch the dough down and turn it out onto a lightly floured surface.  Follow the directions in this video for how to braid it into a loaf.  Cover and let rise until doubled in volume.  Meanwhile, preheat oven to 350 degrees.
6. Brush the loaf with beaten egg and sprinkle with poppy seeds.  Bake for approximately 45 minutes until loaf is golden brown and sounds hollow when tapped.
7. Enjoy your delicious and fabulous-looking loaf of bread.

March 5, 2011

Sweet Cornbread

Cornbread is wonderful, isn't it?  I sure like it, but what happens when you want to eat cornbread and you're out of honey to go with it?  Still good, but not nearly as great...unless you made this recipe.  This one is sweet enough on its own that you don't even need the honey.  It's delicious the way it is!  Don't believe me?  Make it yourself and see.


Sweet Cornbread
(adapted from "Golden Sweet Cornbread" on allrecipes.com)

1 cup all purpose flour
1 cup yellow corn meal
1/3 cup white sugar
1/3 cup brown sugar
1 tsp salt
1 Tbsp baking powder
1 egg
1 cup milk
1/3 cup oil (if yours is too crumbly, try adding a bit more oil to hold it together)

1. Preheat oven to 400 degrees (F) and grease a 9-inch round cake pan or an 8x8 square casserole dish.  (If you're going to make muffins instead, grease the muffin tins and reduce cooking time to 15 minutes.)
2. In a large mixing bowl, combine flour, corn meal, white sugar, brown sugar, salt, and baking powder.  Stir in egg, milk, and oil until well combined.
3. Pour batter into prepared dish and bake for 20-25 minutes or until a toothpick comes out clean from the center.
4. Slather on some butter and enjoy your glorious cornbread creation.

February 24, 2011

Cinnamon Nutmeg Banana Bread

Do you ever buy a bunch of delicious looking bananas, only to discover the next day that they're already turning brown?  I do.  And since I found this recipe, sometimes I even buy older-looking bananas specifically to use for banana bread.  Remember, the key to good banana bread is in having really, really ripe bananas.  If they aren't ripe enough, you could put in 12 bananas, and it still wouldn't taste much like banana bread.  I got this recipe from Heather Chapple and adapted it just a bit to my taste.  It is delicious every time.


Cinnamon Nutmeg Banana Bread
3-4 large, very ripe bananas, mashed
1 cup sugar
1 egg
1/4 cup butter, softened
1/4 cup applesauce
2 cups flour
1/2 tsp salt
1 tsp baking soda
1 tsp cinnamon
1/4 tsp nutmeg

1. Preheat oven to 350 degrees (F).
2. Combine mashed bananas, sugar, egg, butter, and applesauce.
3. Add four, salt, baking soda, cinnamon, and nutmeg until well blended.  A lot of people say that it turns out better if you mix all of the dry ingredients in a separate bowl before mixing them into the wet ingredients, but if you want to save time, just dump them all in the same bowl and try to make sure that you sprinkled them fairly evenly.
4. Pour into an ungreased loaf pan.  Bake for one hour at 350 degrees.
5. Cool for 5-10 minutes in pan, then remove to cooling rack.
6. Eat!  I love it best warm with butter.
Related Posts Plugin for WordPress, Blogger...