October 26, 2011

Corn Chili

I found this recipe when we were newlyweds and I was in my final semester of college.  Money was tight, and that meant that recipes that were hearty and filling (but didn't include meat) were on the menu.  I threw together this chili with whatever I had laying in the pantry and some guidance from good old allrecipes.com.  It takes no more than 20 minutes from the time you decide to make it until it's on the table.  This made a surprisingly big pot of chili that lasted quite a while.  Try serving it with sour cream and tortilla chips.  Or pair it with a little homemade cornbread, and it's the perfect meal to warm you up on a chilly autumn day.

Image Source
Corn Chili
(adapted from Corn Chili on allrecipes.com)

2 Tbsp vegetable oil
1 onion, diced
1 tsp ground cayenne pepper (or less if you don't want it to be too spicy)
2 tsp dried oregano
1 tsp taco seasoning (optional)
2 cans corn (or 1 lb frozen corn)
2 cans (14.5 oz) diced OR stewed tomatoes (regular or Mexican-style for more spice)
1 can (15 oz) pinto beans, drained
1 can (15 oz) kidney beans, drained
2 chicken bouillon cubes (or 2 tsp granules)
1 cup water
1/2 tsp salt
1/4 tsp pepper
1 1/2 cups tomato sauce
2 Tbsp tomato paste

1. In a large stock pot, cook onion in oil over medium heat for one minute.  Stir in cayenne pepper, oregano, and taco seasoning.  Cook one minute more, stirring.  This recipe can easily be adjusted to suit your tastes.  Play around with the spices, adding more or less, to achieve that perfect chili taste that will win you first prize in the neighborhood chili cook-off.  
2. Stir in corn, tomatoes, beans, bouillon, water, salt, pepper, tomato sauce, and tomato paste.  Cook, uncovered, until heated through and slightly thickened, 10-15 minutes.  If it's too thick, just add more water. Too thin?  Add a bit more tomato paste.
3. Serve your chili in a large soup bowl and let it warm you right up.

October 22, 2011

Beef Taco Bake

One of my neighbors gave me this recipe a few weeks ago.  It sounded simple and tasty, so I was excited to try this week.  I tweaked it just a bit to my personal preference, and it tasted great.  Each night, it gets better and better somehow.  And the best part is that it's lasted us three dinners so far, and we still have some left--which is surprising.  Usually a dish like this will last two nights max, but this one is really filling, so you don't have to eat much to be satisfied.  I'm definitely keeping this one.

Image Source
Beef Taco Bake

1 cup rice, uncooked (white or brown works just as well here)
3/4 lb ground beef
1 package taco seasoning (or just under 1/4 cup taco seasoning and about 1/2 cup water)
1 can black beans
1 can corn
1 can tomato soup
1 cup salsa
tortillas (optional)
sour cream (optional)

1. Cook rice according to package directions and preheat oven to 350 degrees F.
2. Meanwhile, brown ground beef and drain the fat.  Stir in taco seasoning (and however much water the taco seasoning tells you to add).
3. Combine rice, ground beef, black beans, corn, tomato soup, and salsa in a 9x13 baking dish.  Cover and bake for 25 minutes, or until bubbly.
4. This dish can be served alone or rolled up in a tortilla with a dollop of sour cream.  Enjoy it again and again until it's gone.

October 21, 2011

Baked Ziti

Last year my church did a recipe night where we all made a favorite recipe and brought it to share.  This baked ziti recipe was a sure hit.  I went back for seconds... and possibly thirds.  When I found out how easy it was to make, I was sold.  Thank you, Heather, for this awesome recipe.

Image Source
Baked Ziti

8 oz ziti or penne pasta, uncooked
1 jar spaghetti sauce
1 1/2 cups water
16 oz cottage cheese
2 cups mozzarella cheese (divided into separate 1-cup portions)
1/4 cup parmesan cheese

1. Preheat oven to 350 degrees F.
2. Combine all ingredients (reserving 1 cup of mozzarella cheese for later) in a 9x13 baking dish.  Cover with aluminum foil and bake for 55 minutes.
3. Uncover, top with the remaining 1 cup mozzarella cheese, and bake uncovered for 5 more minutes, or until cheese is melted.
4. Bam!  Eat it up.  That was delicious and easy, right?

October 5, 2011

Ham and Potato Soup

I'm sitting here on my couch all cuddled up in a blanket.  Tonight is supposed to be the first really cold night since last winter.  With cold weather on the brain, warm food comes to mind.  My crock pot soups are always favorites when the weather is chilly, but this ham and potato soup is one of my all-time favorites.  You can whip up a pot in about half an hour, and it is delicious in a bread bowl.

Image Source
Ham and Potato Soup
(adapted from Delicious Ham and Potato Soup on allrecipes.com)

3 1/2 cups potatoes, diced
2 stalks celery, sliced
1/3 cup onion, finely chopped
3/4 cup cooked ham, diced (even cutting up lunch meat works here)
3 1/2 cups water
5 chicken bouillon cubes (or about 2 Tbsp bouillon granules)
1/2 tsp salt
1/2 tsp pepper
5 Tbsp butter
5 Tbsp flour (also the same as 1/4 cup + 1 Tbsp)
2 cups milk

1. Combine potatoes, celery, onion, ham, and water in a large stock pot.  Bring to a boil and cook over medium-high heat for 15-20 minutes, or until potatoes are just tender.  Reduce heat to low and stir in bouillon, salt, and pepper.
2. In a separate saucepan, melt butter over medium-low heat.  Whisk in flour and cook, stirring constantly, for about 1 minute.  Slowly whisk in the milk, stirring constantly to avoid clumps.  Continue cooking, stirring frequently for 5-7 minutes or until the mixture is slightly thickened.  This might take longer than that, depending on how low your heat is.  If it doesn't seem to be any thicker, keep cooking it until it does.
3. Pour milk mixture into the large stock pot and stir to combine.  Turn up the heat to medium, and cook until heated through.
4. Serve up some comfort with this soup in a homemade bread bowl.  Mmm...

Homemade Bread Bowls

What's better than soup?  Soup in a bread bowl, of course.  But what's better than soup in a bread bowl?  Soup in a homemade bread bowl.  It seems like a challenge--like you'd have to be crazy to make your own bread bowls, but it's surprisingly simple and is a sure fire way to impress guests.

Image Source
Homemade Bread Bowls
(from this recipe on allrecipes.com)
*Yields 8 medium bread bowls or 6 large bread bowls

2 (.25 oz) packets active dry yeast (or about 4 1/2 tsp)
2 1/2 cups warm water
2 tsp salt
2 Tbsp oil (I like olive oil best)
7 cups all-purpose flour
1 Tbsp cornmeal
1 egg white
1 Tbsp water

1. In a large bowl, dissolve yeast in warm water.  Let it stand until creamy, or about 10 minutes.
2. Add salt, oil, and 4 cups of flour.  Beat well.  Stir in remaining flour 1/2 cup at a time, beating well with each addition.  When the dough has pulled together, turn it out onto a lightly floured surface and knead until smooth and elastic (about 6 minutes).
3. Place the dough in a lightly oiled bowl, cover with a towel, and let rise in a warm place until doubled in volume (about 40 minutes).  If you have a cold house, which is usually the case when you're making bread or soup, just switch the oven to warm for a minute, then turn it off.  Place the bowl of dough and a shallow pan of warm water into the oven, and let it rise in the warm oven.
4. Punch the dough down, and divide it into 8 equal portions (or 6, if you want larger bread bowls).  Form each portion of dough into a round loaf (basically the same as a large roll).  Make sure that you get it into a nice rounded shape.  If it's too flat, there won't be any room for soup inside it.  
5. Grease 2 cookie sheets and sprinkle them with the cornmeal.  Place dough balls onto the cookie sheets (half on each sheet), and let them rise in a warm place until doubled (about 30 minutes).  Meanwhile, preheat the oven to 400 degrees F.
6. In a small bowl, beat together the egg white (or the whole egg, whatever) and 1 Tbsp water.  Lightly brush the loaves with half of the egg wash.
7. Bake in preheated oven for 15 minutes.  Brush with remaining egg mixture, and bake for 10-15 minutes more (depending on whether you made small or medium-sized bowls), until the loaves are golden brown.  If you're cooking both cookie sheets at the same time, remember to switch which pan is on the top or bottom here so they cook evenly.  Cool on wire racks.
8.  Cut the top 1/2 inch off of each bread bowl, and scoop out the inside bread, leaving a wall 3/4 inch thick on all sides.  Fill it with soup, and use the scooped out bread to dip in the soup.  Delicious!

September 30, 2011

Pizza Crust

I've played around with different recipes for pizza crusts.  Every single time, my hopes are high.  I bite into my freshly baked pizza, only to taste gross, dry, disgusting crust.  Disappointment.  But I finally found one that tastes great!  It was awesome, and even though I had to wait for it to rise, it was totally worth it.  This recipe yields two large pizza crusts, so if you only want to make one pizza, just refrigerate or freeze the other half of the dough before you let it rise. Okay, let's make some pizza.

Image Source
Pizza Crust
(adapted from Jay's Signature Pizza Crust on allrecipes.com)

*Yields 2 large pizza crusts

2 1/4 tsp active dry yeast
1/2 tsp brown sugar
1 1/2 cups warm water
1 tsp salt
2 tsp olive oil
3 1/3 cups flour
2 Tbsp melted butter (or olive oil)
Garlic powder to taste

1. In a large bowl, dissolve the yeast and brown sugar in water, and let the whole thing sit for about 10 minutes.  If you've never seen yeast dissolve before, sit and watch. It looks pretty neat, in my opinion.
2. Stir the salt and oil into the yeast solution.  Mix in 2 1/2 cups of the flour.
3. Turn the dough out onto a lightly floured surface and knead in the rest of the dough until it's smooth and elastic (or just leave it in your kitchen aid and let it do the work).  Divide the dough into two equally-sized balls.  If you're just making one pizza, now's the time to refrigerate or freeze one of the dough balls.  Cover the bowl with a cloth and let it rise until doubled in size (about 1 hour).
4. Punch down the dough and form it into a ball again.  Let it sit for a minute to relax before rolling or stretching it out.  Preheat your oven to 425 while you're waiting.  Lightly oil your pizza pan or cookie sheet, and fill it with the dough.  If you want a puffier crust, just fold the edge back over onto itself and press to keep it in place.  Brush the crust with melted butter or olive oil, and sprinkle the garlic salt over the whole thing.  Let it rise 15-20 minutes more.
5. Top it with your favorite toppings (see here for all kinds of topping ideas) and bake on a low rack in the oven for 15-20 minutes, or until the cheese and crust are golden brown.
6. Buon appetito!

September 26, 2011

Sweet Potato Fries

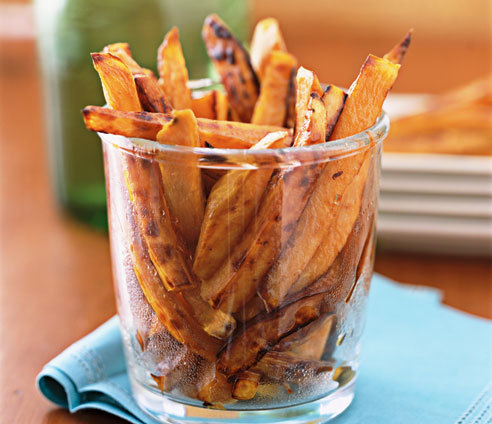
My little boy is starting to eat solid foods--a major step in life.  Consequently, I've been checking out all kinds of books from the library about how to make homemade baby food.  One of the recipes was Sweet Potato Fries for Baby.  Babies can eat sweet potato fries?  Lucky babies.  It sounded tasty enough to me, so I decided to make some for the little man.  But they looked so delicious as they were cooking that I did some tweaking and made an adult version for myself.  Yum!  Who knew that the inspiration for a new recipe could come from a baby food book?  I promise though, these taste nothing like baby food.  Just try them and see.

Image Source
Sweet Potato Fries

2 sweet potatoes
1 Tbsp olive oil
salt to taste

1. Preheat oven to 425 degrees F and line a baking sheet with aluminum foil.  You'll be so happy that you did when it comes time to clean up.
2. Peel and slice sweet potatoes into 1/3 inch slices.  Cut each slice into 1/3 inch thick strips.  They're starting to look like fries already!
3. Combine olive oil and salt in a mixing bowl, and add sweet potato strips.  Toss to coat the strips completely.  Place the sweet potatoes onto the lined baking sheet, making sure that they form a single layer with no fries stacked up on top of each other.
4. Bake at 425 for 15 minutes, stir, then bake for 15 minutes more (for a total of 30 minutes).  Dip in your favorite fry sauce and devour.

September 21, 2011

Raspberry Jam

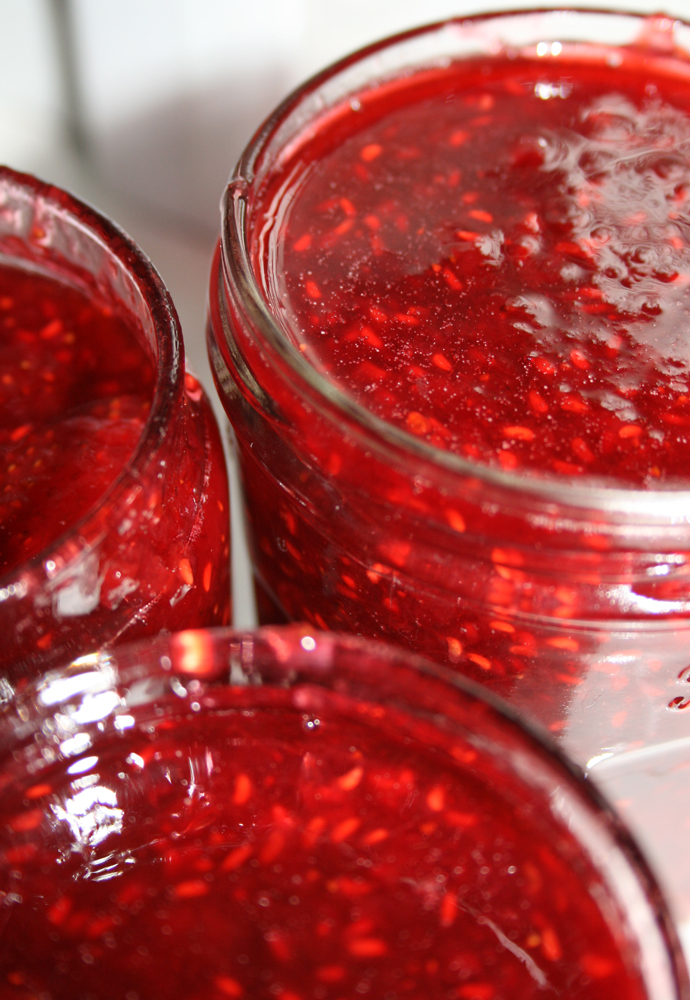
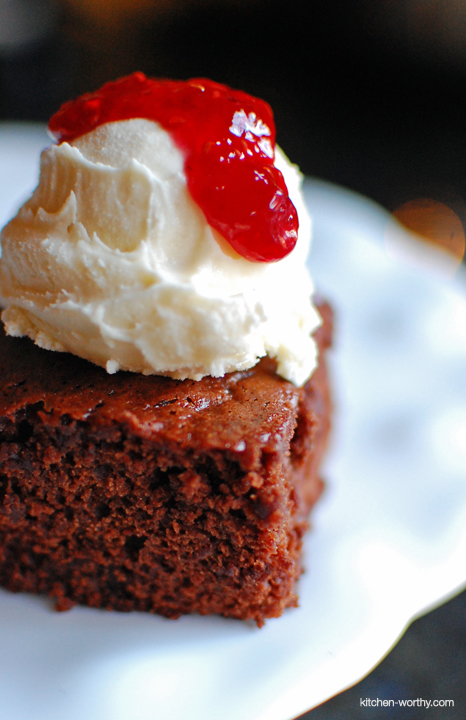
I've always secretly wanted to know how to can things--jam, fruit, salsa, apple butter...you get the idea.  But I've never really known how and never really wanted to invest time or money into figuring it out.  This month I finally jumped in and canned something--raspberry jam.  Sunflower Market was having a sale on raspberries, so I stocked up, borrowed a canner from a lovely neighbor, and got to work.  I am happy to say that even though my first batch was a little runny, it was still delicious (and even more so on top of a brownie a la mode). This is an old time recipe I got from The Joy of Jams, Jellies, and Other Preserves, which I borrowed from the library.  Don't you just love books?  Since the recipe is more old-fashioned, it doesn't call for pectin--but don't let that scare you.  This jam turned out to be delicious.  I am officially a canner!

Image Source
Raspberry Jam
(from The Joy of Jams, Jellies, and Other Preserves by Linda Zeidrich)

*Yields about 2 pints or 5 half-pints

2 lbs raspberries
3 cups sugar
2 Tbsp lemon juice

1. In a preserving pan, mash the raspberries with a potato masher.  Add sugar and lemon juice.  I did a little bit of research, and I guess professional chefs will sometimes warm their sugar in the oven or microwave first to cut down on cooking time since warm things boil more quickly.  
2. Over medium heat, heat the mixture, stirring gently, until the sugar is dissolved.  Raise the heat to medium-high and boil the mixture, stirring frequently, until either a drop of jam mounds on a chilled dish or the jam "sheets" as it pours off of a chilled spoon.  See here for a more complete explanation.  The second time I made this jam I boiled it for about 12 minutes, and it was perfect.  Keep in mind though that altitude plays a big role, and I live at about 4300 feet above sea level.
3. Ladle the jam into pint or half-pint mason jars, add lids and rings, and process in a boiling water bath for 10 minutes.
4. Be proud of yourself for canning your own, homemade, old-fashioned raspberry jam, and forget about toast or peanutbutter sandwiches--just slather that jam on a brownie a la mode!

Image Source

September 20, 2011

Egg and Potato Skillet

We've had an overabundance of spinach in our household lately.  So in my zeal prevent any of it from spoiling before I used it, I spent a lot of time researching recipes that use spinach.  I found this potato skillet recipe on allrecipes.com and used ideas from a lot of the comments.  The result was delicious and inexpensive.  I love when that happens.  Bon appetit!

Image Source
Egg and Potato Skillet
(adapted from Spinach and Potato Frittata on allrecipes.com)

2 Tbsp olive oil
3 regular russet potatoes, thinly sliced (or 6 small red potatoes)
1/4 cup onion, sliced
1 can mushrooms
1 cup spinach leaves, tightly packed and roughly chopped
1 can (15 oz) diced tomatoes (I used the Italian style, but I'm sure regular would be delicious as well)
1 tsp garlic salt
pepper to taste
4 eggs (The original recipe calls for 6, but since I added extra ingredients, 4 were all that would fit in my skillet.  If you have a bigger skillet, by all means use more)
1/4 cup milk
1/3 cup cheddar cheese, shredded

1. Heat olive oil in a skillet over medium heat.  Toss in the potatoes, onions, and mushrooms, and cook about 10 minutes, stirring occasionally, until potatoes are just tender.
2. Mix in spinach, diced tomatoes, garlic salt, and pepper, cooking 1-2 minutes more until spinach is wilted.
3. In a small bowl, mix eggs and milk.  Pour egg mixture over the vegetables in the skillet, then sprinkle on the cheddar cheese.  Cover and reduce heat to low.  Cook about 5-7 minutes more, or until eggs are no longer runny.  If you want your cheese to get a bit crispy, just remove the lid for the last few minutes.
4.  Butter up some toast and serve it up.

September 9, 2011

Honey Chicken

My mom had a bunch of family over for dinner the other day and made honey chicken.  It was incredible!  I asked for the recipe, and it turned out to be one of the simplest recipes yet.  Every time I've had this dish, it has been tender and flavorful.  Give it a try.

Image Source
Honey Chicken

2-3 lbs boneless, skinless chicken thighs
1/2 cup honey
1 Tbsp ketchup
1 cup soy sauce
1 cup water
1 clove garlic, minced

1. Place chicken in slow cooker.
2. In a separate bowl, combine all other ingredients and pour over chicken.  Cook on low 4-5 hours.
3. Serve over rice and be amazed at the incredible flavor.  That was easy!
Related Posts Plugin for WordPress, Blogger...